Showing posts with label tutorial. Show all posts

2.07.2011

Coolest Tip EVER!

This weekend we went to my parents house to celebrate family birthdays and, because we live in WI, the Superbowl (even though I could careless.  About the Superbowl that is.).

My daughter decided to color a picture at my parents dining room table with a permanent marker.  Well, it bled through onto the table. The worst part, my dad's boss (who he wants to truly impress), is coming over for dinner on Tuesday.  In a moment of crises we came up with only one resolution.  A table cloth.  Not the best choice.

After doing a quick search online, we found the answer.  I assure you!  It WORKS!

COLGATE!  However, use the plain white paste.  It works better than this stuff.

Put a generous amount of toothpaste on the permanent marker
With a cloth, start scrubbing.

Then, watch it disappear.

Here is what was left.  The white toothpaste will remove this too.  I plan on picking up a tube to get the rest off.

Amazing, right?


2.03.2011

Recycled Sweater to Pencil Holder - Tutorial

My son, Caden, is always searching for a pencil when he needs to start his homework.  They're usually shoved in a basket on the bookshelf that is filled with God only knows what.  So, I wanted to make a cute pencil holder for him to easily access his pencils when he needs them.

Love it!  Another super easy project.


You will need only a few things... 

old sweater
tin can
scissors
glue gun

Cut off one of the sleeves, about 4 inches longer than the can is tall.  Then cut it down the seam of the sweater (unless your sleeve fits snugly around your can.  Then skip the next few steps... mine didn't).

Glue one edge of the sweater to the can, leaving a small amount of the sweater hanging over the bottom edge of the can - not much.

Fold over the opposite side of the sleeve and glue it down.

Wrap it around the can and glue this folded edge on top of the other edge.

Sorry for the bad picture here - too small of a depth of field.  
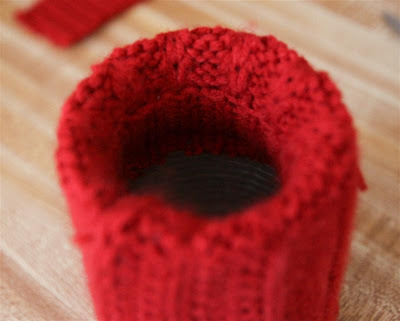
Anyway, tuck the top of the sweater into the can and glue it down.

Carefully glue the bottom edge of the sweater under the can, making sure to get all of the loose ends so that it doesn't fray.  The above picture has only half of the sweater glued to the bottom so you can see how I am pulling all of those loose ends down.  That's it.  Now fill it with pencils!


Recycled Sweater to Ear Warmer - Tutorial

Have you seen the really cool knit (or crochet) ear warmers this winter?  I'm in love with them!  I attempted to knit one this week but I suck with increases.  My decreases were tolerable, but not so hot.  It wasn't what I was going for.  So, I decided to make one out of an old sweater I got at the thrift store for $1.95.  The best part of the project is that it only took me about 15-20 minutes.  Easy peasy!  That's my kind of project.

Meet my Friend, Anya, who is wearing my new creation!  Isn't she gorgeous?  The best model anyone could ask for... and... she has had four children and still looks drop dead gorgeous.  That's something to be proud of!  Thanks for modeling, Anya!  :)


Here is what I did.
The old sweater.

I cut down the seam of the cowl neck.

Then cut it off the sweater and lay it out.

I used the one I knitted as a pattern.  It's about an inch and a half wide at the ends, 4 inches wide in the center, and about 24 inches long.

I cut it out a bit wider than the one I knitted... about 2 inches on the ends and 5-6 inches in the center.

Run it through a zig zag stitch on your sewing machine.

When I put it on my head, it was a bit too long.  This is how much the ends overlapped when I put it on.

I put a button hole on one end.  Then I put it back on my head to see where the button needed to go.

I sewed on the button.  Here you can see how much extra there was.

I just cut it off and ran that edge back through the sewing machine.

Here it is finished.

The button is just not in the center of the back, which I ended up liking better anyway!  It gave it more interest.

You could make a flower out of the sweater too, if you wanted, but I liked it more simple.

1.31.2011

Newspaper Fabric Ball - Tutorial

You have all seen them.  The fabric rag balls.


I wanted to make some for this cool platter my grandmother gave me for my birthday, but I didn't feel like hauling three children to the store in the cold weather.  blah.  So, I came up with a short cut.


Here is what you need: 
Scissors
Newspaper
Long strips of fabric
glue gun

Ball up one piece of newspaper

Put your ball of newspaper on top of another piece and start rolling it up.

 Tuck the sides in as you go.

You should have something like this when you get to the end.

Now just glue it down really well with your hot glue gun.

Cut long strips of fabric no wider than 1 inch.  I had some quilted strips that I was using for a quilt I started and never finished, but you can just you long strips of one color.

Put hot glue at the end of one of your strips.

 Attach it to the ball and start wrapping.

 When you get to the end, add glue to the end of the strip.

 Glue it underneath a strip that is right next to it.

 Look over your ball for fabric that is sticking up.

Glue it down. This will secure the strips so they don't slide off.

Then, stick them in a cool bowl and set it on your table.  I have a few more to make to fill up my bowl, but I think it looks great for not costing me anything.


1.19.2011

Waterproof Candy Filled Vase Tutorial

I always love when people make flower arrangements and fill the vases with interesting objects.  Unfortunately, if you use a filler that isn't waterproof, you have to use fake flowers.  Or do you?


Here is how you can do this with water and real flowers.


First get a vase, a smaller vase or glass that will fit inside the larger one, and enough filler.  


Place the smaller glass inside the larger one, centering it the best you can.


Then pour your filler in between the large and small vases.


Now you can put your flowers in the center... water and all.


1.18.2011

Candy Heart Garland

I'm excited about the new look for my blog. The design comes from the same lady who designed my photography business blog. I'm still working on things and will hopefully have it finalized soon.

Also... I will have more info on the Sew and Tell competition in a day or two. If you would like to sign up, please do so asap!

________________________________________________

Valentines Day is a big deal for Alanna because we usually have or go to a party with her friends. This year, I have promised her we would have one here. So, I've been thinking about decorations, activities and food. I'm sure I will be posting a lot more ideas over the next few weeks.

Anyway...

Last night I made a garland out of candy hearts. It was easy once I came up with a way to do it.


For my first attempt, I hot glued them to a grosgrain ribbon. However, when you hung it up, the hearts faced downwards. Fail.

I figured it was the weight pulling it over, so I glued another row of hearts to the backside of them. Same thing. Fail.


Getting annoyed, I gave it one more chance. I used a thick thread instead of the ribbon. I took two hearts and sandwiched them together, hot gluing the thread to the top, back of the hearts. You can get an idea of what I mean by the above picture.


It looks adorable and it was really cheap! Success!